Five minutes, done. Step by step.
Install Vitrio film at home without a pro. Step-by-step to a clean, bubble-free result.
What's in the box
Your chosen film and the full install kit ship in a single box. Everything you need to install it.

- Your chosen Vitrio film, cut to your display
- Vitrio Application Fluid spray
- Vitrio Cleaning Wipe (degreasing wipe)
- Vitrio Application Card
- Vitrio Application Cloth (microfiber cloth)
- QR code to the install video
Four things to know

Don't install on a hot surface
Let the screen cool, avoid direct sun. Above 40 °C the adhesive doesn't bond properly.

Don't install in the cold
Below 5 °C the film won't bond reliably. Wait until the cabin warms up.

Close the doors
Drafts pull dust and lint onto the surface. Work in a still, enclosed space.

Dust the surroundings
Wipe the surrounding panels too. A single speck is enough to leave a bubble.
Five steps, that's it
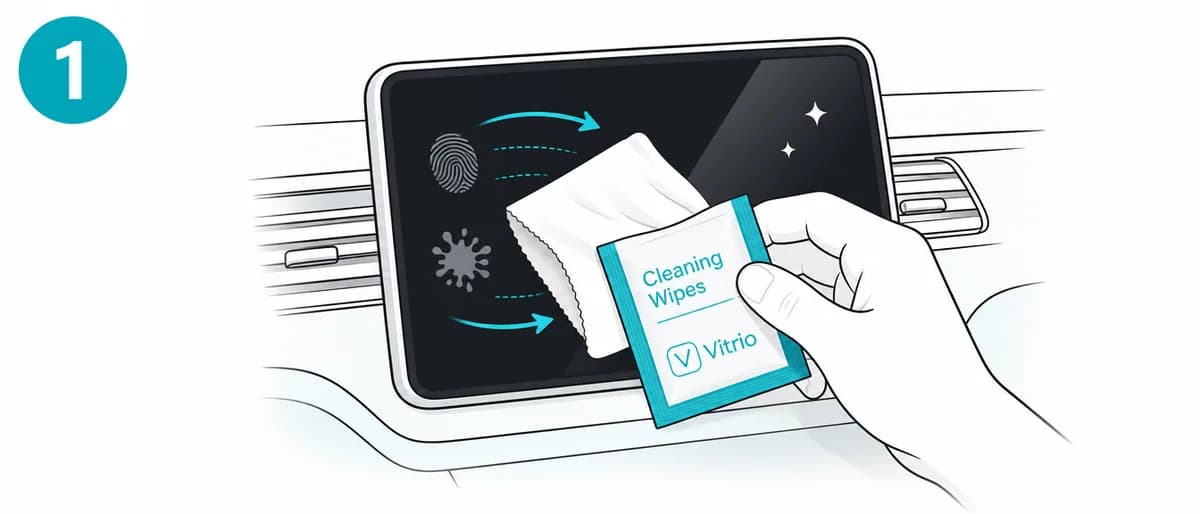
- 1
Clean and degrease
Open the Vitrio Cleaning Wipe pouch and wipe the entire display thoroughly. Remove fingerprints, oils and dust. Let it dry completely.
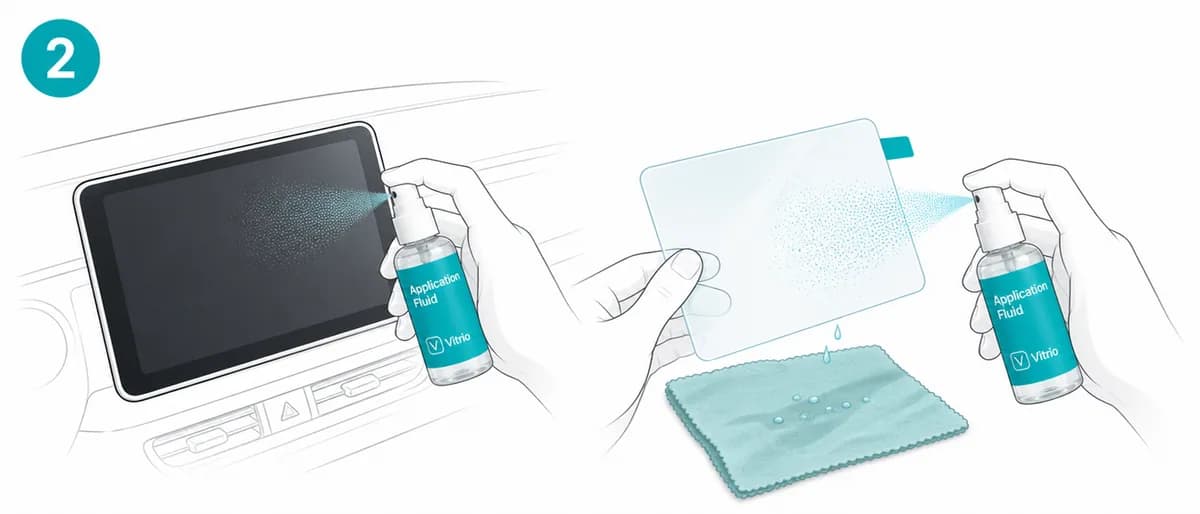
- 2
Apply the fluid
Spray the Application Fluid evenly onto the display, then onto the adhesive side of the film. No need to soak it, a thin even layer is enough. Place a microfiber cloth under the display so drips don't reach unwanted surfaces. If any fluid does land elsewhere, wipe it off right away. It causes no damage if you react quickly.
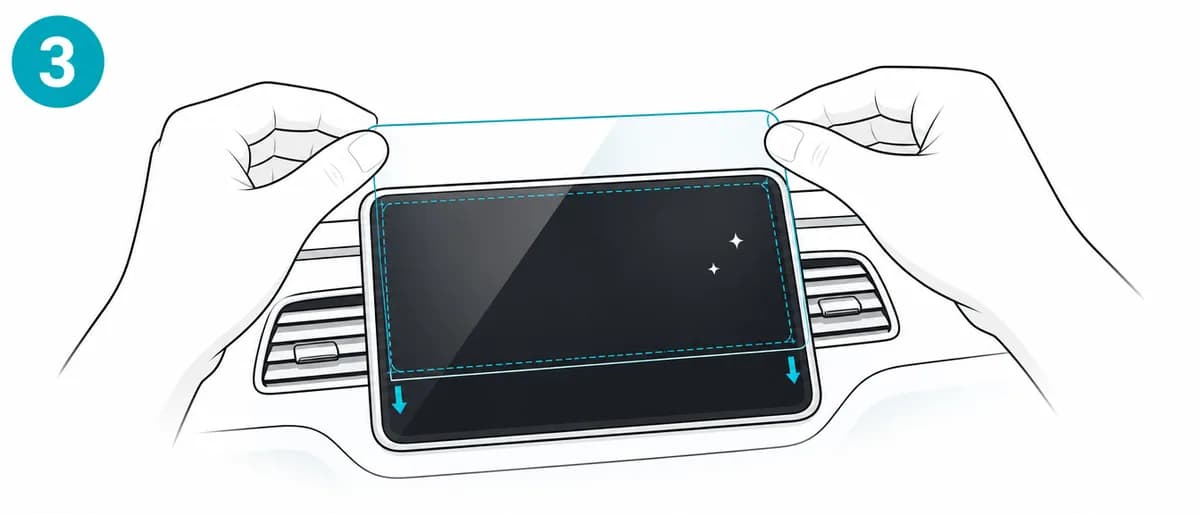
- 3
Place the film
Lay the film on the display and align it precisely. The fluid keeps the surface slippery, so for the first 1–2 minutes you can still correct the position.
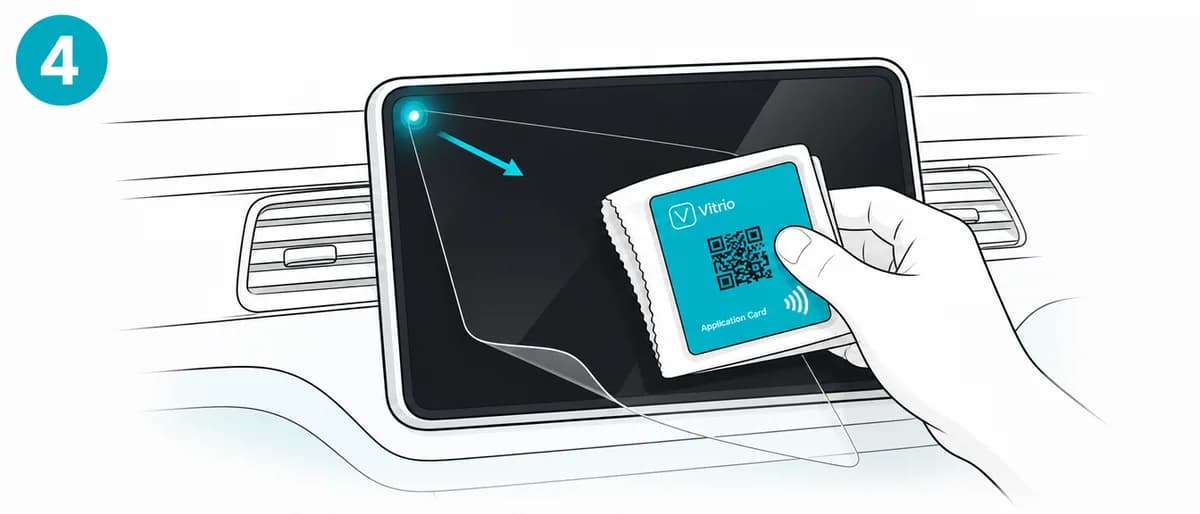
- 4
Anchor with the Application Card
Wrap the Application Card with the Application Cloth. Starting from one corner, press the card against the film and lock that corner to the surface.
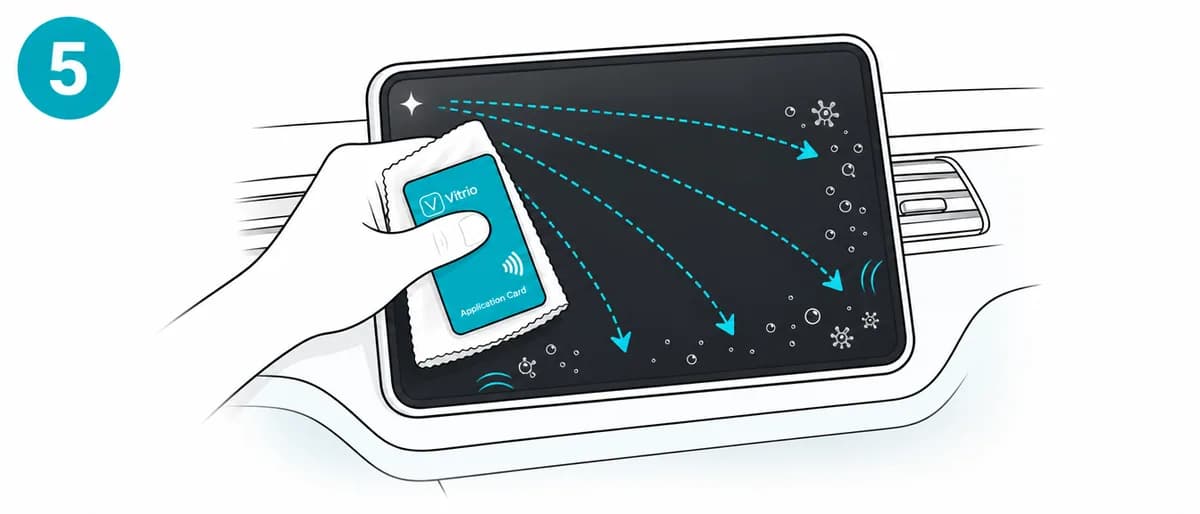
- 5
Squeegee out the water
Starting from the anchored corner, work top to bottom with steady pressure to push out the water and air bubbles from under the film. Take your time.
Bubble-free, perfectly fitted film
If you need to reposition in the first few minutes, gently lift the edge and adjust. The fluid hasn't fully set yet.
Stuck? Reach out, we'll help.
Write to us →